Feeds:
Posts
Comments

Archive for the ‘big shot’ Category

As of a few days ago, all of my finches had flown the nest. Both nests are empty, I’ve left them in the flower pots to see if birds re-use nests. But for now they are empty and we are waiting for more babies. The
best part of this experience is that now my kids are always on the lookout for bird nests. They see them everywhere and get so excited! And honestly, it makes my little naturalist heart proud that they are always on the lookout for these things. They are learning that nature is all around us, even in town where we live and we don’t have to drive to the mountains to enjoy nature. This is one of those little things that I hope they carry with them always.

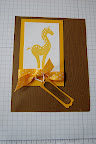
And now for my latest obsession: birds and tags.

Bird on a branch tag.

Egg tag

This one is my favorite so far. The burlap, the egg, the paper. The metal bookplate was one I’d had for quite a while but never used because it was bright pink! To alter it I added a coat of gesso and let it dry. Painted on brown, added some vaseline after it was dry, then dabbed on some ivory paint. It didn’t turn out quite like I’d hoped but I like it anyway. Reminds me of a crusty painted old piece!

Read Full Post »

Had this photo of my dad and my little guy working on an ancient car. Really wanted to scrap it, to tell the story about how these two guys hang out and do stuff. Also wanted to cut into my big pack of Sweet Pea DSP for the first time!
(all supplies Stampin Up!)

Excuse the poor lighting but you get the idea. I somewhat simple LO on kraft, with a few embellies, and lots of story in my own handwriting. And while the journaling was what I wanted and told the story–the important part of scrap booking. It wasn’t very nice to look out. Now I’m not trying to win a scrappy contest, get published, or get on any design teams. I just want my pages to tell the story and look sort of nice. You understand right?

So here was my triage process.

1. Cut off the kraft background. Lay on white clipboard, try different color backgrounds.

2. Bermuda Bay background, not bad. And now that I look at it on the computer I like it.

3. End up choosing Chocolate Chip cs. But still needed something in that bottom rectangle. So I add a piece of pattern paper.

4. Finally end up using my Scallop envelope die to make a little spot to tuck in the journaling cards.

And there’s the final product. Much better huh? I think the kraft would have been fine if I hadn’t journaled right on it.

Read Full Post »

Finally getting back into making things. I’ve finished my yearly calendar Christmas gifts for my family. I know that January is nearly over but they are done and in the mail. Better late than never or as the postman said yesterday, “at least you’re early for next Christmas”. A nice way to look at things. I’ve been playing with my new goodies from the new Occasions Mini from Stampin Up. The clear mount stamps are wonderful to use and I love the storage!

I love butterflies, so when I saw the new butterfly embossilit, I had to have it!
So far I’ve taken my favorite in colors (bermuda bay, dusty durango, and rich razzelberry) and made several sets of butterflies to use on various projects. These combined with the vintage vogue wheel are becoming my favorites!

A birthday card

And a thank you tag

Next up will be scrap booking with these lovelies!

Read Full Post »

Wednesday night was my monthly card club and the first orders with the new catalog. It’s a fun group of ladies who enjoy stamping and chatting. They made two cards.

The first uses the Animal Stories and Woodgrain background sets. I love this giraffe, I think this card would be a great birthday or new baby card

The second uses the damask stamp from the Friends 24-7 stamp set. The sentiment was embossed using the new Rich Razzelberry classic ink pad using a new trick I learned. To emboss with regular stamp ink, 1st stamp on a versamark pad, then stamp on your ink pad, add embossing powder, and heat to emboss. I was pretty excited to see how well this worked as it now gives me many more options for embossing! I was inspired by this card by Jill Hilliard to use the damask stamp.

I also showed a couple of other card options.

Bright Flowers

Owl Get Well. This is the stamp set I thought of when I first saw the woodgrain background. So fun and funky, it’s a new favorite!

Specs: (All supplies SU)

Giraffe Card
-Animal Stories, Teeny Tiny Wishes, and Woodgrain stamps
-whisper white, crushed curry, soft suede card stock
-soft suede ink
-accessories: crushed curry polka dot ribbon, word window and modern label punch, paper piercer, embroidery thread

Damask Card
-Friends 24-7, Oval All stamp sets
-whisper white, rich razzleberry, basic gray card stock
-rich razzleberry and versamark ink
-accessories: rich razzleberry polkadot ribbon, clear embossing powder scalloped oval and large oval punches

Bright Flowers Card
-Woodgrain and Teeny Tiny Wishes stamp sets
-basic gray, rich razzleberry, bermuda bay, melon mambo, crushed curry card stock, and old olive card stock
-basic gray ink
-accessories: basic gray taffeta ribbon, scallop edge, modern label and word window punches, flower blossom sizzlet

Owl Get Well Card
-Forest Friends, Teeny Tiny Wishes, and Woodgrain stamp sets
-soft suede, whisper white, dusty durango card stock
-soft suede and dusty durango ink
-dusty durango polka dot ribbon, word window and modern label punch, paper piercer, embroidery thread

Read Full Post »

I made a sampler with the new In Colors to give to the ladies in my card club when they picked up their new Stampin Up! catalog.

In color Sampler

Specs:
-card stock and ink: soft suede, dusty durango, crushed curry, melon mambo, rich razzleberry, and bermuda bay
-stamp set: Animal Stories
-accessories: crushed curry polka dot ribbon, scallop and circle punch, book ring

I also finished my 2nd card for my swap, here are two versions. I ended up going with the hello card for my final swap.

Friend to Friend

Specs:
-card stock and ink: soft suede, dusty durango, crushed curry, melon mambo, rich razzleberry,
-stamp sets: Animal Stories, Teeny Tiny Wishes
-accessories: Big Shot, harlequin texture plate, crushed curry polka dot ribbon, staple

Hello

Specs:
-card stock and ink: soft suede, dusty durango, crushed curry, melon mambo, rich razzleberry, bermuda bay, whisper white craft ink
-stamp sets: Animal Stories, Teeny Tiny Wishes
-accessories: Big Shot, harlequin texture plate, brad, word window and modern label punch

Read Full Post »

Along with the super cute cherry dress card I came up with 3 other cards. Here they are.

Sweet cupcake card, made with the SU Big Bold Cupcake die that I borrowed from a friend and now must have for my very own. I’m thinking I will try cutting some lightweight fabric with this die, how cute would it be to make cupcake patches for my little girl?

Polka Dot Birdie card, trying to use a nearly full pack of Tangerine Tango!

Great Friend card, cased from Julee Tilman. Hers used the Great Friend stamp set but I love my butterfly die (beats hand cutting!)

Specs: (all SU)

Cupcake card
-Washington Apple Designer Series Paper
-riding hood red and whisper white card stock
-Sweet little sentiments, hostess stamp set
-accessories: big shot, Big Bold Cupcake die, glue dots, silver brad

Polka Dot Birdie
-Good Friend Designer Series Paper
-tangerine tango, pacific point, and whisper white card stock
-tangerine tango and pacific point ink
-accessories: big shot, SU Texture Polka Dot texture plate, scallop punch, circle punches, and scallop border punch

Great Friend
-Walk in the Park Designer Series Paper
-baja blue and whisper white card stock
-baja blue and pink pirouette ink
-Great Friend stamp set
-accessories: big shot, butterfly die, top note die, basic gray taffeta ribbon

Read Full Post »

Last night was my card club and since it was the last one with the current catalog I wanted to come up with some really fun cards. A while back I was browsing my favorite blogs on my google reader and found the cutest card on Craftin Caro’s blog. And while I’ve cased cards online before, I normally change it to make it my own. But this card was so cute I just had to copy to the ground! (okay, I changed a few details) I had seen other versions of this scallop dress card but loved this one the cherry paper! So here’s mine

Normally I ignore the inside but I had this cute stamp set that just seemed to fit with this card!

Now, while I’d seen several different versions of this in blogland I couldn’t find a good template so I made my own by counting the number of scallops on the top and bottom of dress, then experimented with the best lines to cut to get the shape.
Specs: (all Stampin Up!)
-Rockabilly Speciality Designer Series Paper
-card stock: kiwi kiss, riding hood red, whisper white
-accessories: Big shot, large scallop circle die, trio flower punch, silver brads, kiwi kiss satin ribbon
-stamp set Classy and Fabulous

Read Full Post »

Forest Friends

Like most people I am in love with everything in the Stampin Up! new Spring mini catalog! When the pre-order time came I ended up with three sets but the one I really just had to get was the “Forest Friends” set. For some reason it struck me as a little funky-vintage and I loved the tree! I have been playing with this set and have 2 fun cards to share.
The first was one I created for a recent demo swap.

You might notice the card is not in the best shape, this is what happens when your three year twins want to play with the deer! I just haven’t made a new one yet:) The pink and brown seemed liek a sweet baby card. I used one of my favorite sets, Fundamental Phrases to make this a baby card.
Specs: (all SU)
-chocolate chip card stock, ink, ribbon
-pink pirouette card stock
-Candy Lane DSP
-Forest Friends set
-Fundamental Phrases set
-circle and word window punch
-paper crimper
-scallop edge punch

My second card is pretty simple and uses the owl along with the Good Morning Sunshine paper. I added a scrap of Pacific Point that I had run through the Big Shot with the small polka dot texture plate.

Specs:
-Whisper White card stock
-Pacific Point card stock
-Old Olive card stock
-Chocolate chip ink and ribbon
-Good Morning Sunshine DSP
-Scallop circle and edge punches
-Big shot, small polka dot Texture plate

Honestly, I just purchased the Big Shot a few weeks ago and I am amazed at how much I’ve used it already! I knew I’d love it, I’d seen enough projects online, played with a friends enough to know I’d love it. But I was surprised at how much I’ve used it. I have a Cricut that I purchased a year ago, and I’ve yet to use it enough to justify the cost or get into using it as much as I thought I would. Oh well, live and learn right?

Read Full Post »

DIY Butterfly Wreath

In my lovely google reader, I get inspiration from Decor 8, a really great site full of design inspiration in graphic, home, fashion, and lots of other lovely things! While I live in a house occupied by three year old twins and a husband who doesn’t mind my decorating attempts–as long as they don’t interfere with his daily routines:) So, I try to keep it simple, and out of the reach of little people! Anyway, I found this post about wreaths. And I fell in love with the butterfly wreath. Now, I am a DIY girl who just bought the Big Shot from Stampin Up! along with the exclusive Butterfly die! So, I knew I could make this. Now if you don’t have this very cool thing, you could cut your own butterflies using an image from your computer’s clip art or do an image search for a simple butterfly template.

I also found in this article a link to a beautiful etsy artist, Beach Cottage Studio who sells butterfly wreaths and cut butterflies that you can buy to use on your own projects.

Here’s what you need:
-butterfly die or template, need 2 or 3 different sizes
-double sided patterned papers, I used the free Salabration paper from Stampin Up!
-embroidery hoop
-adhesive, I used gel medium which sticks to anything and dries clear
-ribbon to hang

Steps:
1. cut out a variety of butterfly shapes, the Big shot butterfly die cuts 4 different butterflies at a time, which makes this go fast!

From Butterfly Wreath

2. Lay your hoop flat, place a few butterflies to see how you want it to hang. My hoop was a 49 cent find at my favorite thrift store, it’s plastic, with a large bulky piece that I decided I could use as a hanger for ribbon.

From Butterfly Wreath

3. Next, start layering the butterflies. I folded the butterflies in the center a little, then brushed adhesive on the center.

From Butterfly Wreath

Alternate sizes, and papers, working around the wreath until it’s as full as you’d like it.

From Butterfly Wreath

This would be a fun project for older kids. And if you don’t want to deal with a messy adhesive you could use glue dots instead. I also thought halfway through this that one could laminate the paper to make this a durable outer door wreath.
I’d love to see your variations on this!

Read Full Post »