Feeds:
Posts
Comments

Archive for the ‘minibooks’ Category

I know I’ve mentioned this a time or two, but I’m a little busy. And I know that I am not alone in this club! One thing that gets lost in the business of life is my scrapbooking. I used to be a “super scrapper” staying up all hours of the night, even keeping up on my photos and stories. And then graduate school and career started to take over my life and I dropped my scrapping. The problem is I love scrapping, love making mini books for our family and for the grandparents. And mostly I like to keep a record of our family life that says- we where here.
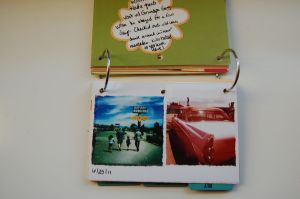
A while back at one of my favorite thrift stores I found a set of monthly 4×6 index card dividers. While looking thru my junk this spring I found them again and thought they’d be a great mini book for the year. This is also a way for me to keep track of stories through out the year so I can go back (maybe) and do large scrapbook pages.

Many of the photos I took this summer I used my iphone hipstamatic app, these are smaller and square.
-In photoshop I resized and placed two photos on a 4×6 canvas to print.
-I cut various papers into 4×6 pieces
-bought a package of word bubble type embellishments
-saved tickets and other bits of everyday life
-Punched holes and bound with a ring

cover

a few inner pages

What I love:
I can make this as big as I need to by changing the rings.
It’s just the right size for the kiddies to handle. And there are not a lot of extra embellies on it so it’s not delicate.
I can adapt this to any season, maybe even make one for each kid as a highlight of their year?
This can be as complex/simple as you want to make it!

If you haven’t scrapped in a while or don’t srapbook, this is a super easy way to document your photos and record stories!

Read Full Post »

Birds are on my mind a lot lately. When I sit down to journal, I always do a status update of the 2 finch nests. What I like about birds is their way of gathering found materials to create a nest that is strong enough to lay their eggs and keep them safe until they hatch. You don’t see birds looking for the latest pottery barn catalog, or watching some decorating show for new ideas. They stick to what they know: nest building. And they use what they find. A reminder to me that my home is not a sum of it’s coordinating pillows are fancy stuff. Making do with what I have, using what’s on hand instead of rushing to the store to get what I think I need.
One skill I have is gathering and collecting. If you could see the things I’ve collected and stored away for “some” day. Last weekend I found some of the little Jenni Bowlin bingo cards. I see these online and covet them thinking of the wonderful things I’d make if I had these. So I bought a little pack. Normally these would get looked at for a while, then put away for something “special”. But yesterday I was in a mood, and got to making stuff. My two little people were watching pbs and I was nearly manic with the need to make something, get a paintbrush out, dirty up my hands. I felt a little bad that I wasn’t doing something with my kiddies or being productive doing house work or homework. But I got over it pretty quick! 🙂

So here is a little bird book. Made from a few of my favorite bits of things I’ve been holding onto. Does it have a purpose? Not really, other than to be something little and pretty and in tones of ivory.

front cover with bird punched out of a Starbucks sleeve

inside, small watercolor painting.

back cover

Read Full Post »

This past year has been rough, not just personally but for also for our marriage. I’ll admit that we’ve both been difficult to live with. But with a fresh start to a new year, talking over a lot of things, we are doing better. By the way, we watched the movie Fireproof together. And if you are married, if you are struggling or just perfectly happy, see this movie with your spouse. It is powerful and can really help put things in perspective!

Anyway, it seemed appropriate to make a sweet valentine for my honey that looked at the good, bad, and the in between of our 15 years together. I’m keeping it real here!
My idea was to talk about what a real love story is all about.

First I covered 4 of the On Board heart book pages with the Sending Love DSP. Then added ric rac along the edges from my grandma stash of goodies.

Next I added a scallop envelope to the left hand sides of the book, a pocket on the right side for photos. These I added personal notes to describe a bit of that section of our life together.
Then I went into photoshop and made my story “headers”. I sized them to punch with my 1 3/8 ” circle punch. (The color isn’t right but I rolled with it!)

-starts with a cast of two

-follows the twists and turns of everyday life

-and has no ending

(back)

My husband loved it, and even got a little weepy reading the notes. sweet!

Read Full Post »

I love mini books.
They are fast, fun, great way to document an event with lots of photos, and a great way to share photos. I’ve admitted that I take a lot of photos of my two cuties, but even I can only scrapbook so many photos! So I started three years ago making minis as a way to celebrate seasons and to give to the grandparents.
My two basic types are Tag and Accordion. And these two can be interpreted in many different ways.

I love tag books, either made with pre-made tags or ones I’ve made my own tags or shapes. These were tags I made to the size I wanted, bound with a binder ring, accented with ribbon, ink, paper, and stamps. I also use ribbon or twine for binding. Usually I will add a brief bit of journalling.

Inside:

Another variation of tags is using die cut shapes like the Top Note from Stampin Up!.

This was a gift for my husband showing the things I love about him as a daddy and husband in photos. Each little envelope is a mini love note to him. Kind of sappy but so true.

The second type of mini, the accordion is not a new idea, I’ve seen this done all over magazines and online in a million of ways. But my variation, I call the “wallet mini” I came up on my own when my dad complained that he needed pictures of the babies to pack around to show around. So I wanted to make a mini book of photos to carry that wouldn’t be too “foofy” and would fit in a shirt pocket like the notebooks that he carries daily. Then the hubby piped up that he wanted something that wouldn’t take up too much room in cubical’ville.

I used the size of a business card as the starting point, growing into a slightly larger size to accommodate a 2×3 wallet sized photo. The embellishing and binding is kept simple. My husband likes to stand these on his desk at work. M
I like them to stay closed when folded so I’ll twist a piece of twine around a button or make a “garter” out of ribbon or elastic cording that can be slipped on and off easily!

Using wallet sized photos:

Using smaller photos:

My dad has a spot where he keeps his important daily things along with all of the minis I’ve made for him in the last three years. All of these minis are a little faded and worn. They look like they’ve been carried in a shirt pocket and taken out many times and unfolded. I love seeing this! Love seeing that something that I made is carried with such love!

And to me this is the whole point of minis: your photos are meant to be looked at, carried around, shared, and touched.

Read Full Post »

simple delights mini

I was inspired by Stacy Julian’s challenge to take time to make something for myself. She suggested a mini book to remind us of our blessings. I make mini books for the grandparents and husband but not often for myself. I took this little challenge as an opportunity to make a fun mini to keep with me.

simple delights

I kept it simple with kraft–my new favorite card stock, a few definitions from the Define Your Life set and a few scraps from the Autumn Vine paper pack from Stampin Up! Then I selected a few pics and made a basic plan.

From simple delights

Most of my mini books follow this basic formula, I just add more ribbon or other embellishments as needed.
I used the definitions as the title of each page and as a starting point for my journalling.

From simple delights

And since I love lots of bits of ribbon hanging on things I them to the spine with a dab of liquid glue to hold the ribbons in place. I also added some left over rub-ons and a piece of burlap (another favorite) to finish the cover.

From simple delights

Read Full Post »

In these uncertain times, with money stress and family stress and all the everyday stuff that we all deal with I have to remind myself that my life is really good. We are all healthy and have each other and we have each other. Last week I read off a young mother who’s husband died unexpectedly after a stroke. She has two little boys and now she’s on her own. I can’t even imagine losing Stephen. We’ve been married for 13 years and don’t even want to imagine living with out him or raising our twins without him. To raise money for this family, scrappy and mixed media artist Emily Falconbridge hosted a few silent auctions. I followed along, praying that there would be people out in the blog world who would help out. I was really pleased when Emily announced a way for everyone to participate in any amount and in return would get access to a “Messy Book” video tutorial.
I like her style, it’s fun, funky, messy, with paint and all sorts of other things added to a scrapbook page or mini book. And until now, I haven’t been able to attempt it. Watching her make this book with this and that and paint and paper was very inspiring and fun. So during nap time I decided to make a messy book of my own.

From messy book

I didn’t trust sewing the pages as my machine and I have a very difficult relationship and I didn’t want add any more stress to it.
My idea for this book was to use things I rarely or never use. I’m tired of holding onto a piece of paper or other little thing like I’m afraid there will never be another like it in the world! To start with, I got out the Prima paintable card stock. It has a watercolor paper texture, with a beautiful drawn background that just was waiting for paint. But again, I hesitated to cut into it and use it. No More, I painted and cut it up to add to my book.

From messy book

I also had bought a pack of the 6×6 die cut pages from Making Memories. You know the ones with the cool ledger lines and funky shapes. Yeah I bought them nearly a year ago, waiting for something special.

From messy book

What a dork! At first I was going to make a photo mini out of this and as I gathered things up I decided to make it a journal of sorts. I had a watercolor I had done a few years ago that I never liked but since it’s on my favorite w/c paper Arches (say with a french accent) I never got rid of it so I could paint on the other side.

From messy book

I ripped it into sections added it along with the cover from the w/c paper pad.
Then I added more bits and envelopes and tags until I had a big pile of pages.

From messy book

I then bound it all together with my Bind it All that I was sure I needed and need to use much more. For the cover I added bright pink felt that I will add more stuff to as I use it.

messy book

My book grew and evolved and now I think it will be a art journal, and a place to write my inspiring thoughts and favorite Bible scriptures. I may add paint and gunk it up bit, or I’ll use watercolor and illustrate a few things. Who knows? But right now I’m pretty happy with the final result.

Read Full Post »

Week in the Life Album

I decided to follow along a bit with Ali Edwards and her week in the life project. I’ve done this a few times in my short time as a scrapper (about 3 years) and it’s always fun to see little snippets of our life captured in one place. I have to admit I didn’t do too great with the daily photo thing, and ended up doing a little over two weeks just to feel like I had a good shot of out life.
I used a 5×7 Maya Road chipboard album that I’ve had for at least a year or more. It was nice to finally decide to just use it and not save it for something “special”. I always save the calendar insert that’s in the beginning of each issue of Real Simple, meaning to do something with them and used one for my album <a href=”

From day in the life album

“>cover. Since it’s the fall season I decided to use the “Autumn Vine” patterned paper from Stampin Up! I covered the chipboard pages and used pieces through out the album. This pack of paper is one of my new favorites, I love the colors! Sticking with this pack of paper made it easy to keep my album cohesive and I used the colors in the paper, Really Rust, More Mustard, Sage Shadow, and Chocolate Chip.
I knew if I didn’t keep the formula simple and sit down to make the album it would never get made.

From week in the life album

I dusted off a phrase maker stamp (is that the name?) from Provo Craft that I’ve had for a long time. I used a date stamp from Staples to add the dates to the pages. I still need to finish the journalling and embellishing but I like how the album turned out.
<a href=”

week in the life album

“>Here is the album.

Read Full Post »

For Father’s Day I decided to make a mini album of my favorite pics of my hubby with the kiddies. I had this great red album from Stampin Up! that seemed just right.
This is my 3rd 6×6 album I’ve made. First I really love the size, so easy so quick. And then I love how nice they look when they are on a shelf together. You have to know I love mini books, love coming up with new ways to make and bind. But the one thing I sometimes wish is the ability to expand a book with out lots of hassel. Which is why I love using these ring albums. I’ve done books for each of our little family before, but I could see making one of these for each of us as a favorite shots album that could be expanded.

daddy album

When ever I make a mini book or album I come up with the theme and gather the photos around the theme. Next I decide what paper I want to use or if I want to just do card stock. Then I put the pics in order I want them to appear. This can be chronological or in the order of the story I want to tell. Finally I come up with a basic plan. Lately I’ve really been into using my 4×6 photos without cropping. My basic formula is a simple blocking idea. Here’s my rough sketch.

Nothing real fancy but a very clean design that I seem to use different variations on. It’s also real easy to flip the sketch for a 6×4 photo. I’ve seen more intricate, neater sketches but when I’m making an album or mini book it makes the whole process go much faster when I use this basic sketch. The other thing I like about this sketch is that you can switch out the flower for other embellies or a cluster of flowers, die cuts, or punches.


Something else I’ve started to do is make the photos pockets for journalling tags. I like to write a lot, but I don’t always like to see all of the writing on the page. When making a photo pocket I don’t put adhesive on the top of the photo, then I just slide my tag behind the pic. Again, super easy and quick.


A sidebar, I love to create all kinds of stuff. I love to play with paper and find new ways to do things. However, with two year old twins I have to be smart about my time which is why I come up with quick sketches that I can use over and over again. The other time saving tip I’ve really fell in love with is making kits out of my stuff. You can read that post here.

And now, I’m off to the gym with the kiddies to sweat off some pounds.
‘yay’

Read Full Post »

friends mini book

6×6 accordion “Friend” Mini Book

This book I made to collect photos of my friends at our monthly get-togethers throughout the rest of the year.

friend album

Supplies Used:
I used all of the Cloud 9 “chocolate chalet” paper kit, stickers from “Brittney’s Castle”, Heidi Grace “thinking of you” clear stamps, pink cardstock Bazzill, ink, pink lipstick ink by Ranger, green, pink, blue and silver ink by Colorbox, and chocolate chip ink and ribbon from Stampin Up.

Book Basics:
cut 12×12 cardstock into 6″ strips, scored every 6″ and folded accordion style.

Front Cover, cover with patterned paper, on pink cardstock use clear corner stamps, spell “My”, add brads to corner stamps, and finish with other brads and carsdstock stickers.

Back Cover: cut a 12″ piece of brown ribbon, center on book, adhere, then cover with patterned paper.

Inside pages (front to back)
Usually when I make a mini book I make more than one book. To make the process
easier I will make a general formula for each page. For this book I wanted to alternate the patterned paper pink and brown. Each page was covered in pp,
and one side was for a photo, the other for journaling.
The journaling boxes that were included in the kit had phrases on them that did not fit my project. I used the word cardstock stickers to cover the words and this gives me
the starting point for my journaling as I add my pictures.

1) make large flower with stickers, adding small flowers along stem
2) Cover with pink stripe, and brown circles on the bottom. Add journal box. I double stamped a large corner with the vine stamp. I added the silver on top of the brown to soften it and give it some dimension.
3) cover with brown flowers papers, add text box, and circle stickers
4) cover with brown circle paper, the green is the back side of one of the papers, again I double stamped with brown and silver, adding a flower n the corner
5) cover with pink swirl paper, stamp on white cardstock with corner stamp and brown ink, add cardstock flower
6) cover with brown flower paper, add journal box and pink cardstock flower.
7) use brown paper, stamp with vine stamp and silver ink on left corner. Flower embellishment. Used the large flower stamp, and used the little colorbox inks (which are the same size as each petal!) and I alternated inking each petal then stamped on white paper and cut out. Add circle sticker.
8) cover with pink swirl paper, add journal box.
9) Use brown pattern paper, add journal box
10) use pink paper, same as cover, add brown cardstock, stamp with versa mark using the vine stamp. add cardstock flower.
To finish the book I added the tabs on alternating pages.
What was so great about this project was having a set color pallette and supplies to make the book. By limiting myself to the just the kit I was able to make this pretty quickly and it was fun. I also had lots leftover to add to a scrapbook page, a couple of little cards. The clear stamps gave a really clear image even with the versamark ink. The versamark ink did not show up on the dark patterned papers very well.

Read Full Post »

in praise of kits

Normally I don’t buy kits. Every now and then I’ll order a kit from Coca Daisy or a similar company. But I usually don’t buy the coordinated page kits. I just am not that together or something. However, when I get anything free, I love whatever it is! So I got this cool green paper kit by Heidi Grace from a very cool friend–May– my fellow Fiskateer. It included 6 sheets of double-sided patterned papers, alphas, new brads, adhesive die cuts and card stock embellies. This made making my mini book even easier than ever! I used some extra prints of my favorites of my babies. These pictures just make me happy and so I called my book “Happy memories”.

Happy Book

The book is 5×5 and bound with orange and white ribbon tied together. Pretty simple way to bind a book.
This is also one of the first books I’ve made just for me in quite a while!

Read Full Post »

Older Posts »